LED UV light unit
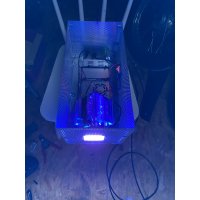
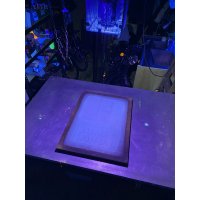
So the basic idea was to have a much more compact UV light for my screen printing because of my available space. A traditional unit was just not practical unless I wall mounted it or something and even then not likely. The best solution was to use the table for exposure, as the space for this was already factored into the system. A light that hangs overhead when the table is horizontal as the table itself is hung on the wall for connivence, shining onto the table doubling up its functionality.
In broad strokes in screen printing the screen creates a negative mask using a block - either emulsion or some solid light impermeable material. You can use a block painted on by hand, and you can use cutout material. But its capable of reproducing very high definition block, like photographic level, and for this you need photo emulsion. After washing and drying the finished mask, when the paint is applied to the back of the screen its pushed though the areas that are the negative of the screen producing colour in that area. And repeat infinitum. To create this photographic screen you need to expose it with an acetate image overlaid, and that requires intense UV light.
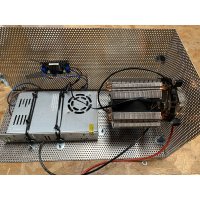
The traditional exposure unit ( UV tubes and a vacuum unit ) takes up a lot of room, and the bigger you want the unit ( like A2 ), of course the more space that it requires. They are usually in effect a box that contains UV tubes, a vacuum to pull the mask onto the screen and a switch. The more expensive ones have a really nice fitting lid and are up at hip height, but basically they haven’t changed in donkeys years. The problem predominantly is their enormous size. After looking at a YouTube video here ( https://www.youtube.com/watch?v=U8qRt4S9w5E ) of a guy building an LED unit I figured I would give it a go. Essentially it consists of a box that houses the LED chip, a transformer for power, a heat sink with an internal fan and a small step down transformer for making 30v into 12v to power the fan.
You can read the technicalities of UV exposure units on the web eg here (https://www.waveformlighting.com/tech/top-4-things-to-consider-before-buying-uv-blacklights), it seems that commercially these are starting to be adopted as it has advantages over more standard UV tubes, which of course due to their very nature create an interference pattern on the exposed surface, and in addition the life of these tubes is very short in comparison to a chip. But a housing with a vacuum unit which they use commercially does create a perfect seal between the screen and the mask.
Here is the basic layout of the components
My first trial was for a design that had a 360W transformer. This as it turned out was the wrong size - I actually needed a 200W to match the chip. In addition this was sucking in air from the surround due to the fan, and that aie being hot of course eventually blew the transformer. Also in this first model I used a cheap heat sinc and a cheap smaller transformer.
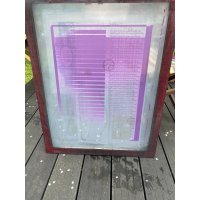
but duly, I managed to produce this test screen without too many issues, which can be seen to be really good quality at 6.5 minutes


